Single-foot Slides – Your Secret Weapon for Better Hockey Training?
If you’re training in hockey, you’ve probably heard about every trick, tip, and tool to up your game. But have you heard of single-foot slides?
Yeah, it’s not exactly the flashiest move, but it might just be one of the most effective. The truth is, these simple, underrated slides could be the edge you’re looking for to become faster, sharper, and more agile on the ice. So, what makes single-foot slides so good for hockey training, and how can you incorporate them to make an impact?
Let’s dig in, break down the benefits, and see if single-foot slides could be a game-changer for your hockey training regimen.
Why Are Single-Foot Slides Good for Hockey Training?

When you’re on the ice, you need more than just power—you need agility, balance, and that quick reaction time to stay one step ahead. Single-foot slides target the very muscle groups and movements that hockey demands, especially those explosive movements that make or break plays.
Here’s why they’re a great addition to your training:
- Balance and Stability: Hockey demands excellent balance. Single-foot slides zero in on your stabilizing muscles, training you to keep steady on one foot at a time.
- Explosive Power: These slides engage the glutes, quads, and hamstrings, helping to build the muscle power necessary for those explosive sprints on the ice.
- Core Strength: Maintaining form during a slide means engaging your core. In hockey, a strong core keeps you agile, helping you absorb hits and make sharp turns.
- Joint Health: Single-foot slides are low impact. They’re gentle on the knees, hips, and ankles, meaning you get strength training without the joint strain.
In short, single-foot slides replicate a lot of the movements you’re making on the ice, making them an ideal drill for hockey players who want to improve their balance, power, and overall stability.
How to Perform Single-Foot Slides Properly
Like anything in training, technique is everything. Here’s a step-by-step guide to mastering single-foot slides:
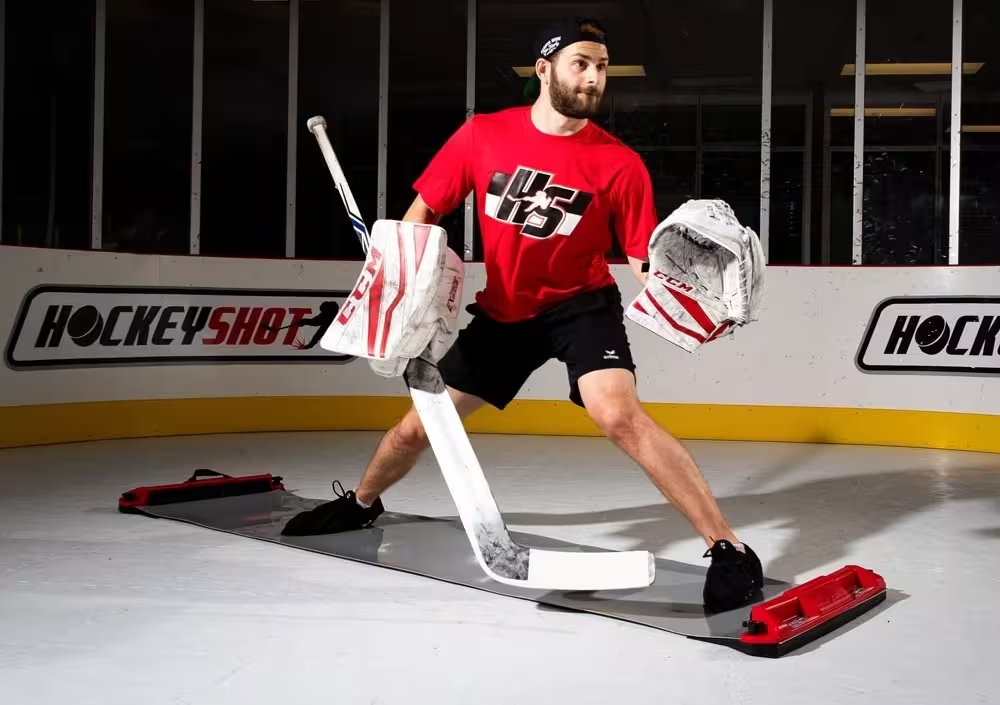
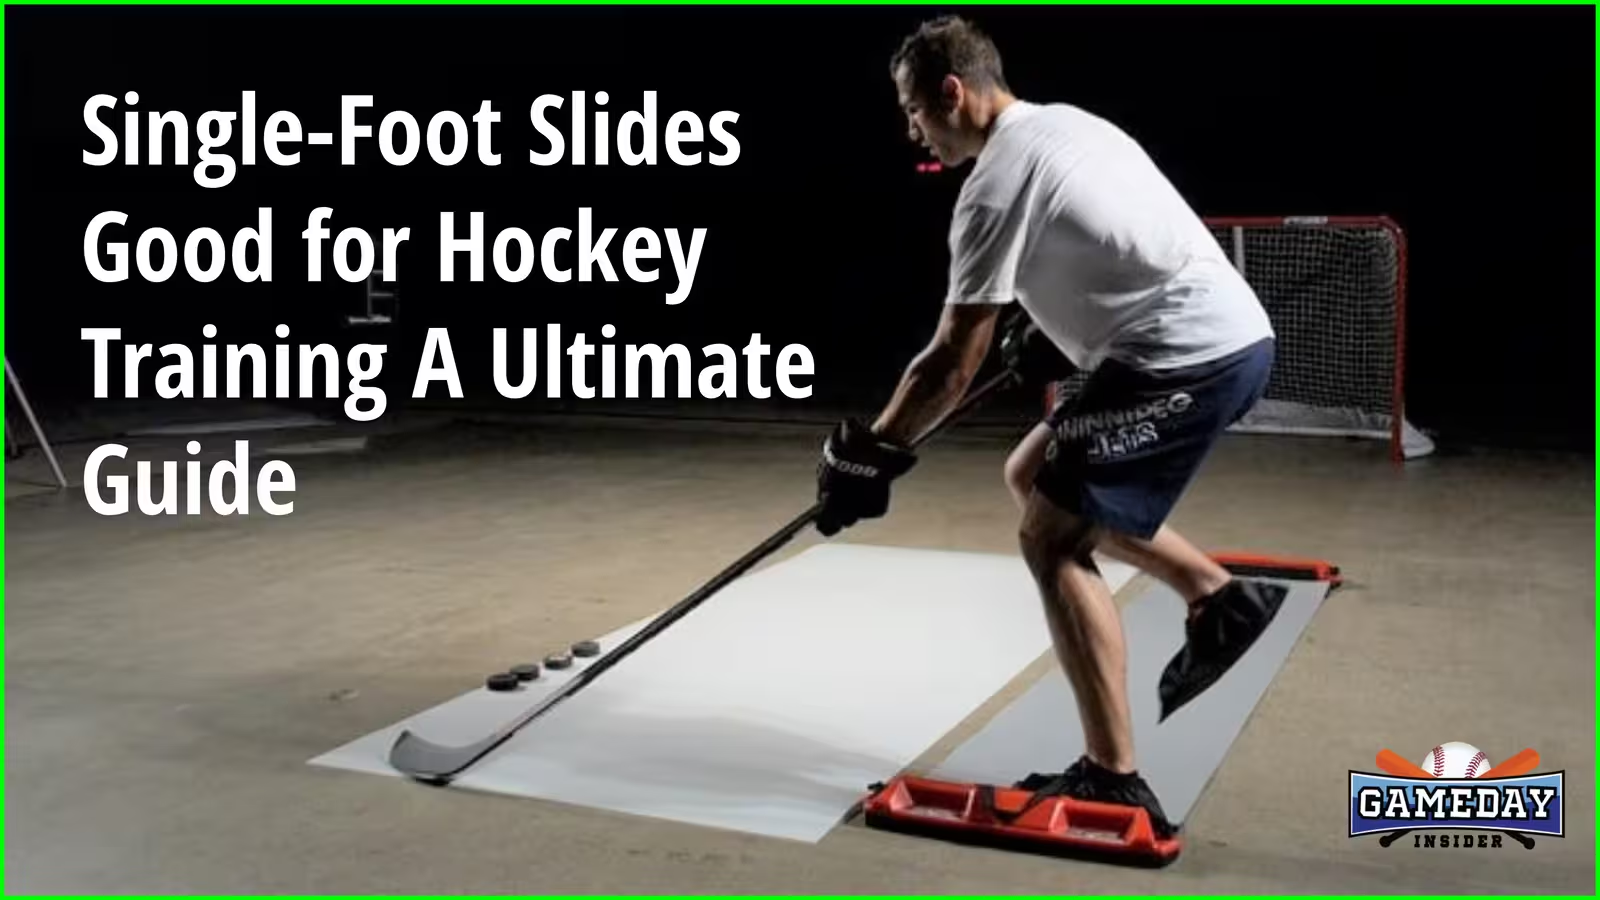
- Set Up the Slide Board: Position a slide board or a smooth mat in front of you. Make sure it’s non-slip for safety.
- Choose Your Sliding Sock or Shoe Cover: If you’re using a slide board, go for specialized sliding socks or a shoe cover that can glide across the surface.
- Start in Athletic Stance: Stand on one foot, keeping your knee slightly bent. This is your anchor leg. Your other leg will perform the slide motion.
- Slide the Free Foot Outward: Slide your free foot out to the side, stretching it away from your anchor leg. Keep it controlled, with your body weight still on the anchor leg.
- Return to Start Position: Using the power in your anchor leg, bring the sliding foot back to the starting position.
- Repeat: Perform 10–15 slides on one foot before switching to the other.
By keeping it smooth and controlled, you’ll maximize the benefits and avoid any unnecessary strain.
Single Foot Slides: Benefits for Agility and Speed on Ice
One of the big reasons hockey players gravitate toward single-foot slides is the agility boost. Agility is your ability to change directions quickly while keeping control of your movement and momentum—key for maneuvering on the ice.
- Lateral Movement Mastery: Hockey isn’t just about forward and backward movements. You’re shifting left to right all the time, pivoting on the spot, and dodging opponents. Single-foot slides mimic that lateral movement.
- Controlled Power: When you glide with control, it’s less about speed and more about muscle engagement. This slow, controlled movement improves your range of motion, and once you add speed to that movement, it feels seamless on the ice.
Where to Incorporate Single-Foot Slides in Your Routine
Not every part of your training session is about building sheer power; some sections are for fine-tuning control. Single-foot slides can fit into various parts of your training routine:
- Warm-Up Routine: These slides can activate your legs and core, getting them ready for higher-impact drills.
- Balance Drills: Add them to your balance training as a main exercise to push those stabilizing muscles.
- Cool Down: Use them as a low-impact movement to finish your workout with a focus on controlled breathing and form.
Real-Life Examples: How Pro Hockey Players Use Single-Foot Slides
Pro hockey players know that single-foot slides aren’t just about looking good on a training board. They add these drills into their routines to keep their edge. Let’s look at how pros use this training tool.
- Example 1: Sidney Crosby’s Stability Training: Known for his solid lower body strength, Crosby uses single-foot slides to work on balance. This has helped him stay strong on his skates, even when opponents are applying heavy pressure.
- Example 2: Auston Matthews’ Quick Lateral Shifts: Matthews has a quick side-to-side movement that keeps defenders guessing. He trains with single-foot slides to fine-tune this lateral agility, making his dodges and turns more effective.
- Example 3: Connor McDavid’s Explosive Starts: McDavid’s explosive speed is legendary, and he credits balance drills, including single-foot slides, for giving him the start he needs to dominate on the ice.
Tips for Maximizing Single-Foot Slides in Your Hockey Training

Adding single-foot slides to your training is a solid start, but getting the most out of this drill requires a bit of strategy. Here are some practical tips to really make these slides work for you:
-
Focus on Form Over Speed
Speed isn’t the goal here—it’s all about stability and control. Concentrate on keeping your balance and maintaining the right form. Speed can come later, but if you rush, you’ll miss out on the real benefits.
-
Incorporate Resistance Bands
For an added challenge, add a resistance band around your thighs or ankles. This increases the intensity and further targets those stabilizing muscles, giving you an extra strength boost.
-
Add Variation
Try different foot angles or vary your sliding distance. Small tweaks like sliding out diagonally or keeping your sliding leg straight can activate different muscle groups and improve your range of motion.
-
Combine with Balance Drills
Try combining single-foot slides with balance drills, like single-leg stands or stability ball exercises. This builds overall core stability and helps improve your balance, which is crucial in hockey.
-
Use Visualization
While you perform the slides, imagine scenarios on the ice—dodging an opponent, racing to the puck, or pivoting to avoid a check. Visualization helps transfer these skills to game situations.
Progressing with Single Foot Slides for Intermediate to Advanced Hockey Players
If you’re an experienced player or have been incorporating single-foot slides for a while, consider stepping up the intensity. Here’s how to progress with this drill:
- Dynamic Slide Variations
Add a hop or small jump as you return to the starting position. This explosive movement increases muscle activation and mimics the quick, powerful movements you need on the ice. - Timed Intervals
Set a timer and perform as many controlled slides as you can in a minute. This turns single-foot slides into a more intense cardio and endurance workout. - On-Ice Adaptation
Once you’re comfortable, try doing these slides with one foot on the ice (using a soft pad or slide sock for the other foot). This bridges the gap between off-ice training and real on-ice performance.
Strengthen Your Hockey Game Off the Ice
You’ve got the slides down and the drills in place, but don’t forget that training off-ice isn’t just about perfecting technique—it’s about building the habits that support your on-ice performance.
Hockey players know that small, consistent efforts can lead to big changes over time. You’ll see real gains in your skating, agility, and balance by consistently adding single-foot slides to your routine. And when you’re up against tough competition, those small advantages can make a difference.
Other Drills to Pair with Single-Foot Slides

While single-foot slides are great for balance and agility, pairing them with complementary drills can round out your training. Here are a few more drills that work well alongside single-foot slides:
- Lateral Lunges
These build lateral strength and help with leg stability. They’re great for replicating the side-to-side movements in hockey. - Box Jumps
A classic for building explosive power, box jumps strengthen your quads, hamstrings, and glutes, enhancing your skating speed. - Core Rotations with a Medicine Ball
Twist movements target your core and can simulate the rotational power needed for slap shots and passes. - Plyometric Skating Drills
These mimic skating strides off the ice and can be paired with single foot slides to build power and endurance.
Real-Life Scenario: When Single Foot Slides Make the Difference
Imagine this: You’re in a fast-paced game, and an opponent comes charging toward you. With only a split second to react, you need to pivot, shift laterally, and stay balanced—all while protecting the puck.
This is where the muscle memory from single-foot slides comes into play. Your body is ready for that quick lateral movement, your core is steady, and your stabilizing muscles are firing just as needed. These slides train your body to respond to real-life situations like this, making every training session a step closer to performing well in critical game moments.
FAQ Section
1. Can beginners use single-foot slides in hockey training?
Absolutely. Start slow, focusing on balance and form. As you improve, you can speed up the slides and add more resistance.
2. Are single-foot slides better than regular skating drills?
They serve different purposes. Skating drills help with on-ice speed, while single-foot slides focus on balance, core strength, and stability, which are all essential for overall skating ability.
3. How often should I do single-foot slides in my routine?
Aim to add them 2–3 times a week. They’re best combined with other strength and agility drills for a comprehensive workout.
4. What equipment do I need for single-foot slides?
You’ll need a slide board or a smooth, non-slip mat and slide socks or covers for your shoes.
5. Do single-foot slides improve my game?
Yes! These slides specifically target stabilizing muscles and enhancing lateral movement, helping you move with confidence and precision on the ice.
Final Thoughts: Making Single Foot Slides a Part of Your Hockey Journey
Single-foot slides may seem like a basic drill, but they’re anything but. By targeting the stabilizing muscles, enhancing your balance, and building explosive strength, these slides serve as a powerful tool for players at any level.
So, if you’re looking to take your game to the next level, don’t overlook these slides. Add them into your routine, keep pushing yourself, and watch how your stability, speed, and confidence improve.

